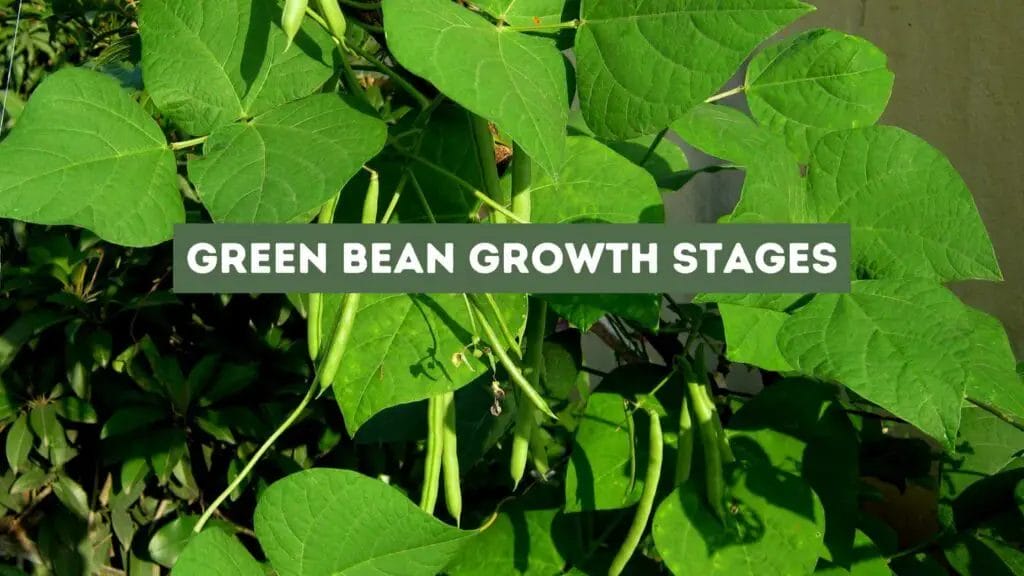
Green beans are a popular and easy-to-grow vegetable that can be planted in the spring and harvested in late summer or early fall. Understanding the different stages of green bean growth can help you cultivate a successful crop.
In this article, you will learn about the five stages of green bean growth: planting seeds, germination, seedlings, flowering and pod sets, maturation, and harvest.
Key takeaways:
- Green Bean Growth Stages: Green beans have five key growth stages: planting seeds, germination, seedlings, flowering and pod sets, maturation, and harvest.
- Germination Stage: This is when the seed sprouts and grows into a seedling. Seed selection, planting depth, soil temperature (60°F to 85°F), and adequate water are crucial for successful germination.
- Seedling Stage: Seedlings develop roots, shoots, and true leaves. They need well-drained soil, balanced nutrients (nitrogen, phosphorus, potassium), and at least 6 hours of sunlight per day.
- Vegetative Growth Stage: The focus is on foliage and stem development. Provide proper watering, nutrients, and 6 hours of sunlight daily. Maintain pH between 6.0 and 7.0 and avoid waterlogging.
- Flowering Stage: Flowers develop and are pollinated by pollinators for pod formation. Ensure full sun exposure, avoid pesticides, and encourage pollinator attraction for successful fertilization.
- Pod Development Stage: Pollinated flowers turn into seed pods. Pods form after flowers drop petals, and mature pods are ready for harvest. Monitor proper growth during this stage.
- Harvesting and Post-Harvest Handling: Harvest beans when young and tender. Use sharp tools, pick regularly, and store properly (refrigeration, freezing, canning) to maintain quality and texture.
Germination
To start the growth of green beans, the germination stage is crucial. This is the period when the seed starts to sprout and grow into a seedling. In this section, we will discuss the important aspects of germination, including seed selection and planting, temperature, and water requirements, and the germination process itself.
Seed Selection and Planting
Choosing the right seeds is essential for a successful germination process. It is recommended to select high-quality seeds that are free of disease and damage. When planting, it is important to place the seeds at the right depth in the soil. Green beans should be planted at a depth of about 1 inch (2.5 cm) in well-drained soil.
Temperature and Water Requirements
The temperature and water requirements during the germination stage are crucial. The soil temperature should be between 60°F to 85°F (15°C to 29°C) for optimal germination. The soil should be kept moist but not waterlogged. Overwatering can lead to rotting of the seeds.
Germination Process
The germination process starts when the seed absorbs water, causing the embryo to swell and break through the seed coat. The first visible sign of germination is the emergence of the cotyledon, which is the embryonic leaf of the plant. As the seedling grows, the root system develops, and the first true leaves appear.
During this stage, it is important to provide adequate light to the seedlings. Green beans require at least 6 hours of sunlight per day. If planting indoors, it is recommended to use grow lights to provide the necessary light.
Seedling Stage
The seedling stage of green beans is an exciting time for any gardener. This is when the tiny seeds you planted begin to sprout and develop into small plants. During this stage, the green bean plant will develop its roots, stem, and leaves. In this section, we will discuss the different aspects of the seedling stage, including root and shoot development and the nutrient and light requirements for healthy growth.
Root and Shoot Development
During the seedling stage, the green bean plant will develop its roots and shoots. The roots will grow down into the soil, absorbing water and nutrients, while the shoots will grow up towards the light. The first leaves to emerge are called cotyledons, which are responsible for providing the initial energy to the plant until it can produce its own through photosynthesis. After the cotyledons, the first true leaves will appear.
It is important to ensure that the roots have enough space to grow and develop properly. You can achieve this by planting the seeds at the correct depth and spacing. Green beans prefer well-draining soil, and overwatering can lead to root rot. Therefore, it is essential to provide adequate drainage for the soil.
Nutrient and Light Requirements
During the seedling stage, the green bean plant requires specific nutrients and light for healthy growth. The plant needs adequate amounts of nitrogen, phosphorus, and potassium to thrive. You can provide these nutrients by using a balanced fertilizer or compost. It is important to follow the instructions on the fertilizer package and not over-fertilize, as this can lead to nutrient burn.
Green beans also require a significant amount of light during the seedling stage. You can provide this by placing the plants in a sunny location or using artificial lights. If you are growing green beans indoors, you can use fluorescent lights to provide the necessary light. It is important to keep the lights close to the plants to prevent them from becoming leggy.
Vegetative Growth
During the vegetative growth stage, the green bean plant focuses on developing its foliage and stems. This stage begins after the seed has germinated and continues until the plant begins to flower.
Leaf and Stem Growth
During this stage, the green bean plant will produce a significant amount of foliage and stems. The leaves will start out small and grow larger as the plant continues to mature. The stem will also begin to thicken and grow taller, providing support for the plant as it grows.
To ensure that the plant is growing properly during this stage, it is important to provide it with adequate water, nutrients, and sunlight exposure. The plant should receive at least 6 hours of direct sunlight each day and be watered regularly to prevent the soil from drying out.
Light and Nutrient Requirements
The green bean plant requires a balanced combination of light and nutrients to grow properly during the vegetative stage. The plant should be provided with a soil pH level between 6.0 and 7.0, which is slightly acidic to neutral. The soil should also be rich in organic matter and well-draining to prevent waterlogging.
To provide the plant with the necessary nutrients, it is recommended to use a balanced fertilizer with equal parts nitrogen, phosphorus, and potassium. This will help to ensure that the plant is receiving the proper nutrients to grow healthy foliage and stems.
During the vegetative growth stage, it is important to monitor the temperature and humidity levels to ensure that the plant is not experiencing any stress. The ideal temperature range for green bean plants is between 70°F (21°C) and 80°F (27°C), with humidity levels between 40% and 60%.
Flowering
During the flowering stage, the green bean plant begins to produce flowers that will eventually lead to the development of pods. This stage is crucial for the plant’s reproductive cycle and the eventual harvest of beans. The flowering stage is the third stage of the green bean plant growth cycle and occurs approximately 40-50 days after planting.
Flower Development
The flowering stage begins with the development of small, white flowers that grow in clusters on the plant. These flowers are typically small and have five petals. As the flowers mature, they will turn pink and eventually purple. The flowers will continue to grow and develop until they reach their full size, which is typically around 1 inch in length.
Pollination and Fertilization
During the flowering stage, the green bean plant relies on pollinators, such as bees and butterflies, to transfer pollen from the male flowers to the female flowers. Once the pollen has been transferred, fertilization occurs, and the plant begins to produce pods. It is important to note that green bean plants require full sun exposure during the flowering stage to ensure proper pollination and fertilization.
One interesting fact about green bean plants is that they are self-pollinating, meaning that they have both male and female reproductive organs. However, they still require pollinators to transfer the pollen between flowers to ensure proper fertilization.
To ensure proper pollination and fertilization, it is important to plant green bean plants near other flowering plants that attract pollinators. Additionally, it is essential to avoid the use of pesticides during the flowering stage, as they can harm pollinators and reduce the chances of successful fertilization.
Pod Development
During the pod development stage, the green bean plant begins to produce seed pods. This stage comes after the flowering stage, where the flowers on the plant are pollinated and begin to form pods. Here are two sub-sections that will help you understand the pod development stage better:
Pod Formation
Pod formation begins when the flowers on the green bean plant are pollinated. The petals of the flower fall off, and the ovary of the plant begins to swell. The ovary eventually becomes the pod that holds the green beans. The pods will continue to grow in size until they are mature and ready for harvest.
It is important to note that not all flowers on the green bean plant will produce pods. Some flowers may not be pollinated, while others may not have developed properly. This is why it is essential to monitor your plants closely during the pod formation stage to ensure that all the pods are growing correctly.
Maturity and Yield
The maturity of the pods varies depending on the type of green bean plant you are growing. Some varieties mature early, while others take longer to mature. The maturity of the pods can also be affected by environmental factors such as temperature and moisture.
Once the pods have reached maturity, they are ready for harvest. It is important to harvest the pods at the right time to ensure that you get the best yield. If you leave the pods on the plant for too long, they will become tough and stringy, making them unpleasant to eat.
In terms of yield, the number of pods you get per plant will depend on several factors, including the variety of green bean plants you are growing, the size of the plant, and the environmental conditions. On average, a mature green bean plant can produce up to 1-2 pounds of pods per plant.
Harvesting
When to Harvest
Understanding the right time to harvest your green beans is crucial to ensure they’re at their highest level of maturity and yield. In general, green beans are harvested when they are young and tender before the seeds inside the pods have fully matured. This is usually around 50-60 days after planting but can vary depending on the variety grown, temperatures, and weather conditions.
To check if your green beans are ready for harvest, gently tug on the pod. If it snaps easily, it is ready to be picked. If it bends or feels rubbery, it needs more time to mature. It is best to harvest your green beans in the morning when they are cool and crisp.
Harvesting Techniques
When harvesting green beans, it is important to use proper techniques to avoid damaging the plant and to ensure a bountiful crop. Here are some tips to help you harvest your green beans effectively:
- Use sharp scissors or pruning shears to snip the pods from the plant instead of pulling them off by hand. This will prevent damage to the plant and help it continue to produce more beans.
- Harvest your green beans regularly, every 1-2 days, to ensure that they do not become overripe and tough.
- If you are harvesting a large crop, consider using a basket or container to collect your beans as you pick them. This will make it easier to transport them back to your kitchen or storage area.
- Once you have harvested your green beans, rinse them thoroughly in cold water to remove any dirt or debris. You can then store them in the refrigerator for up to a week or blanch and freeze them for longer-term storage.
Post-Harvest
After harvesting your green beans, proper post-harvest handling is crucial to maintain their quality and texture. This section will cover two important aspects of post-harvest handling: storage methods and quality and texture maintenance.
Storage Methods
The storage method you choose will significantly impact the shelf life of your green beans. Here are some storage methods to consider:
- Refrigeration: Store green beans in the refrigerator at a temperature between 40°F to 45°F (4°C to 7°C) and a relative humidity of 95%. Green beans stored in the refrigerator can last up to 7 days.
- Freezing: Green beans can be frozen for long-term storage. To freeze, blanch the beans in boiling water for 3 minutes, then immediately transfer them to an ice bath for 3 minutes. Drain the beans and place them in an airtight container or freezer bag. Frozen green beans can last up to 8 months.
- Canning: Canning is another method for long-term storage. Follow proper canning procedures to ensure safety and quality.
Quality and Texture Maintenance
To maintain the quality and texture of your green beans, consider the following tips:
- Avoid washing green beans before storage. Moisture can lead to mold growth and spoilage.
- Store green beans away from ethylene-producing fruits and vegetables, such as apples and bananas. Ethylene can cause green beans to ripen and spoil quickly.
- Check green beans regularly for signs of spoilage, such as discoloration or a slimy texture.
- Avoid overcooking green beans, as this can result in a mushy texture and loss of nutrients.
- Green beans contain starch, which can cause them to become tough and stringy when overcooked. To prevent this, blanch green beans for 2-3 minutes before cooking them in your desired method.
Growing Conditions and Care
To ensure a healthy and bountiful harvest of green beans, it’s essential to provide the right growing conditions and care. This section covers the main requirements for soil, water, light, temperature, and nutrients.
Soil and Water Requirements
Green beans thrive in well-drained, rich soil that is moist but not waterlogged. Loamy soil is ideal, but they can also grow in clay soil if it’s adequately amended. Before planting, make sure the soil is loose and crumbly, with a pH between 6.0 and 7.0. You can improve soil fertility by adding compost or well-rotted manure.
Water is crucial for green bean growth, especially during germination and flowering. Make sure to keep the soil consistently moist but not waterlogged, as excess water can lead to root rot. Watering deeply once a week is usually sufficient, but you may need to water more frequently during hot, dry spells.
Light and Temperature Requirements
Green beans require full sun for optimal growth and production. Choose a sunny spot with at least 6 hours of direct sunlight per day. They also need warm soil and air temperatures to germinate and grow. The ideal soil temperature for planting is around 60°F (15.5°C), while the air temperature should be above 50°F (10°C).
Nutrient Requirements
Green beans are heavy feeders and require regular fertilization to produce a good yield. Before planting, add a balanced fertilizer to the soil, following the manufacturer’s instructions. Once the plants are established, you can feed them every 3-4 weeks with a high-nitrogen fertilizer to promote leafy growth.
In addition to chemical fertilizers, you can also use organic amendments like compost or well-rotted manure to enrich the soil. These materials provide a slow-release source of nutrients and improve soil structure and moisture retention.
Pro Tip:

To maximize your green bean harvest, plant in succession every 2-3 weeks. This will ensure a continuous supply of fresh beans throughout the growing season.
FAQ: Green Bean Growth Stages
What is the average time it takes for green beans to grow?
The average time it takes for green beans to grow from seed to harvest is between 50 to 60 days. However, this can vary depending on the variety of green beans you are growing and the environmental conditions they are growing in.
What are the different stages of growth for pole beans?
The different stages of growth for pole beans are as follows:
1. Seed Stage
2. Germination Stage
3. Seedling Stage
4. Vegetative Stage
5. Flowering Stage
5. Fruiting Stage
How can you identify the different stages of germination of a bean seed?
The different stages of germination of a bean seed can be identified by observing the seed closely. In the first stage, the seed will absorb water and begin to swell. In the second stage, the seed will split open, and a small root will emerge. In the third stage, the root will grow longer, and a small shoot will emerge from the seed. In the fourth stage, the shoot will grow taller, and leaves will begin to develop.
What is the life cycle of a bean plant, and how long does it last?
The life cycle of a bean plant starts with the seed stage, followed by the germination stage, seedling stage, vegetative stage, flowering stage, and fruiting stage. The length of the life cycle can vary depending on the variety of bean plant but typically lasts between 60 to 90 days.
What are the key characteristics of green bean plants?
Green bean plants typically have long, slender green pods that are harvested when they are still young and tender. They can be either bush or pole varieties and require well-drained soil and full sun to grow properly.
What are the stages of the bean crop, and how do they impact growth?
The stages of the bean crop are planting, germination, growth, flowering, and fruiting. Each stage is important for the growth and development of the bean plant and can impact the final yield of the crop. Proper care and attention during each stage can help ensure a healthy and productive bean crop.


